EASY ORIGAMI CHRISTMAS TREES
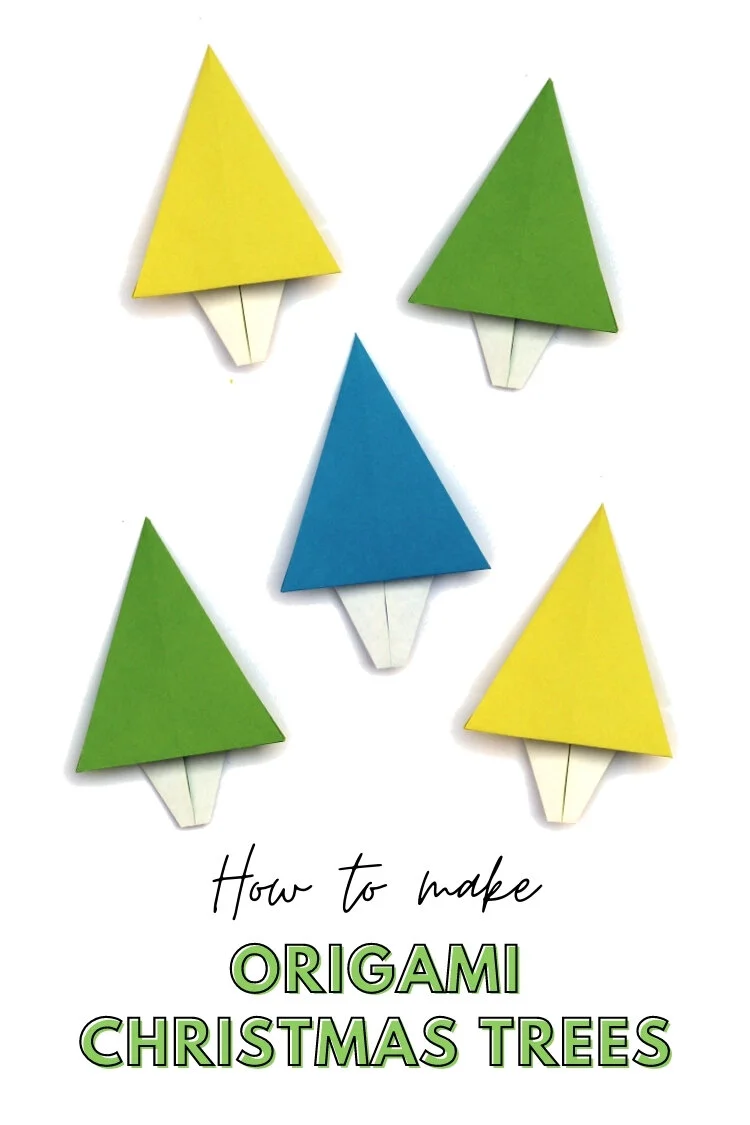
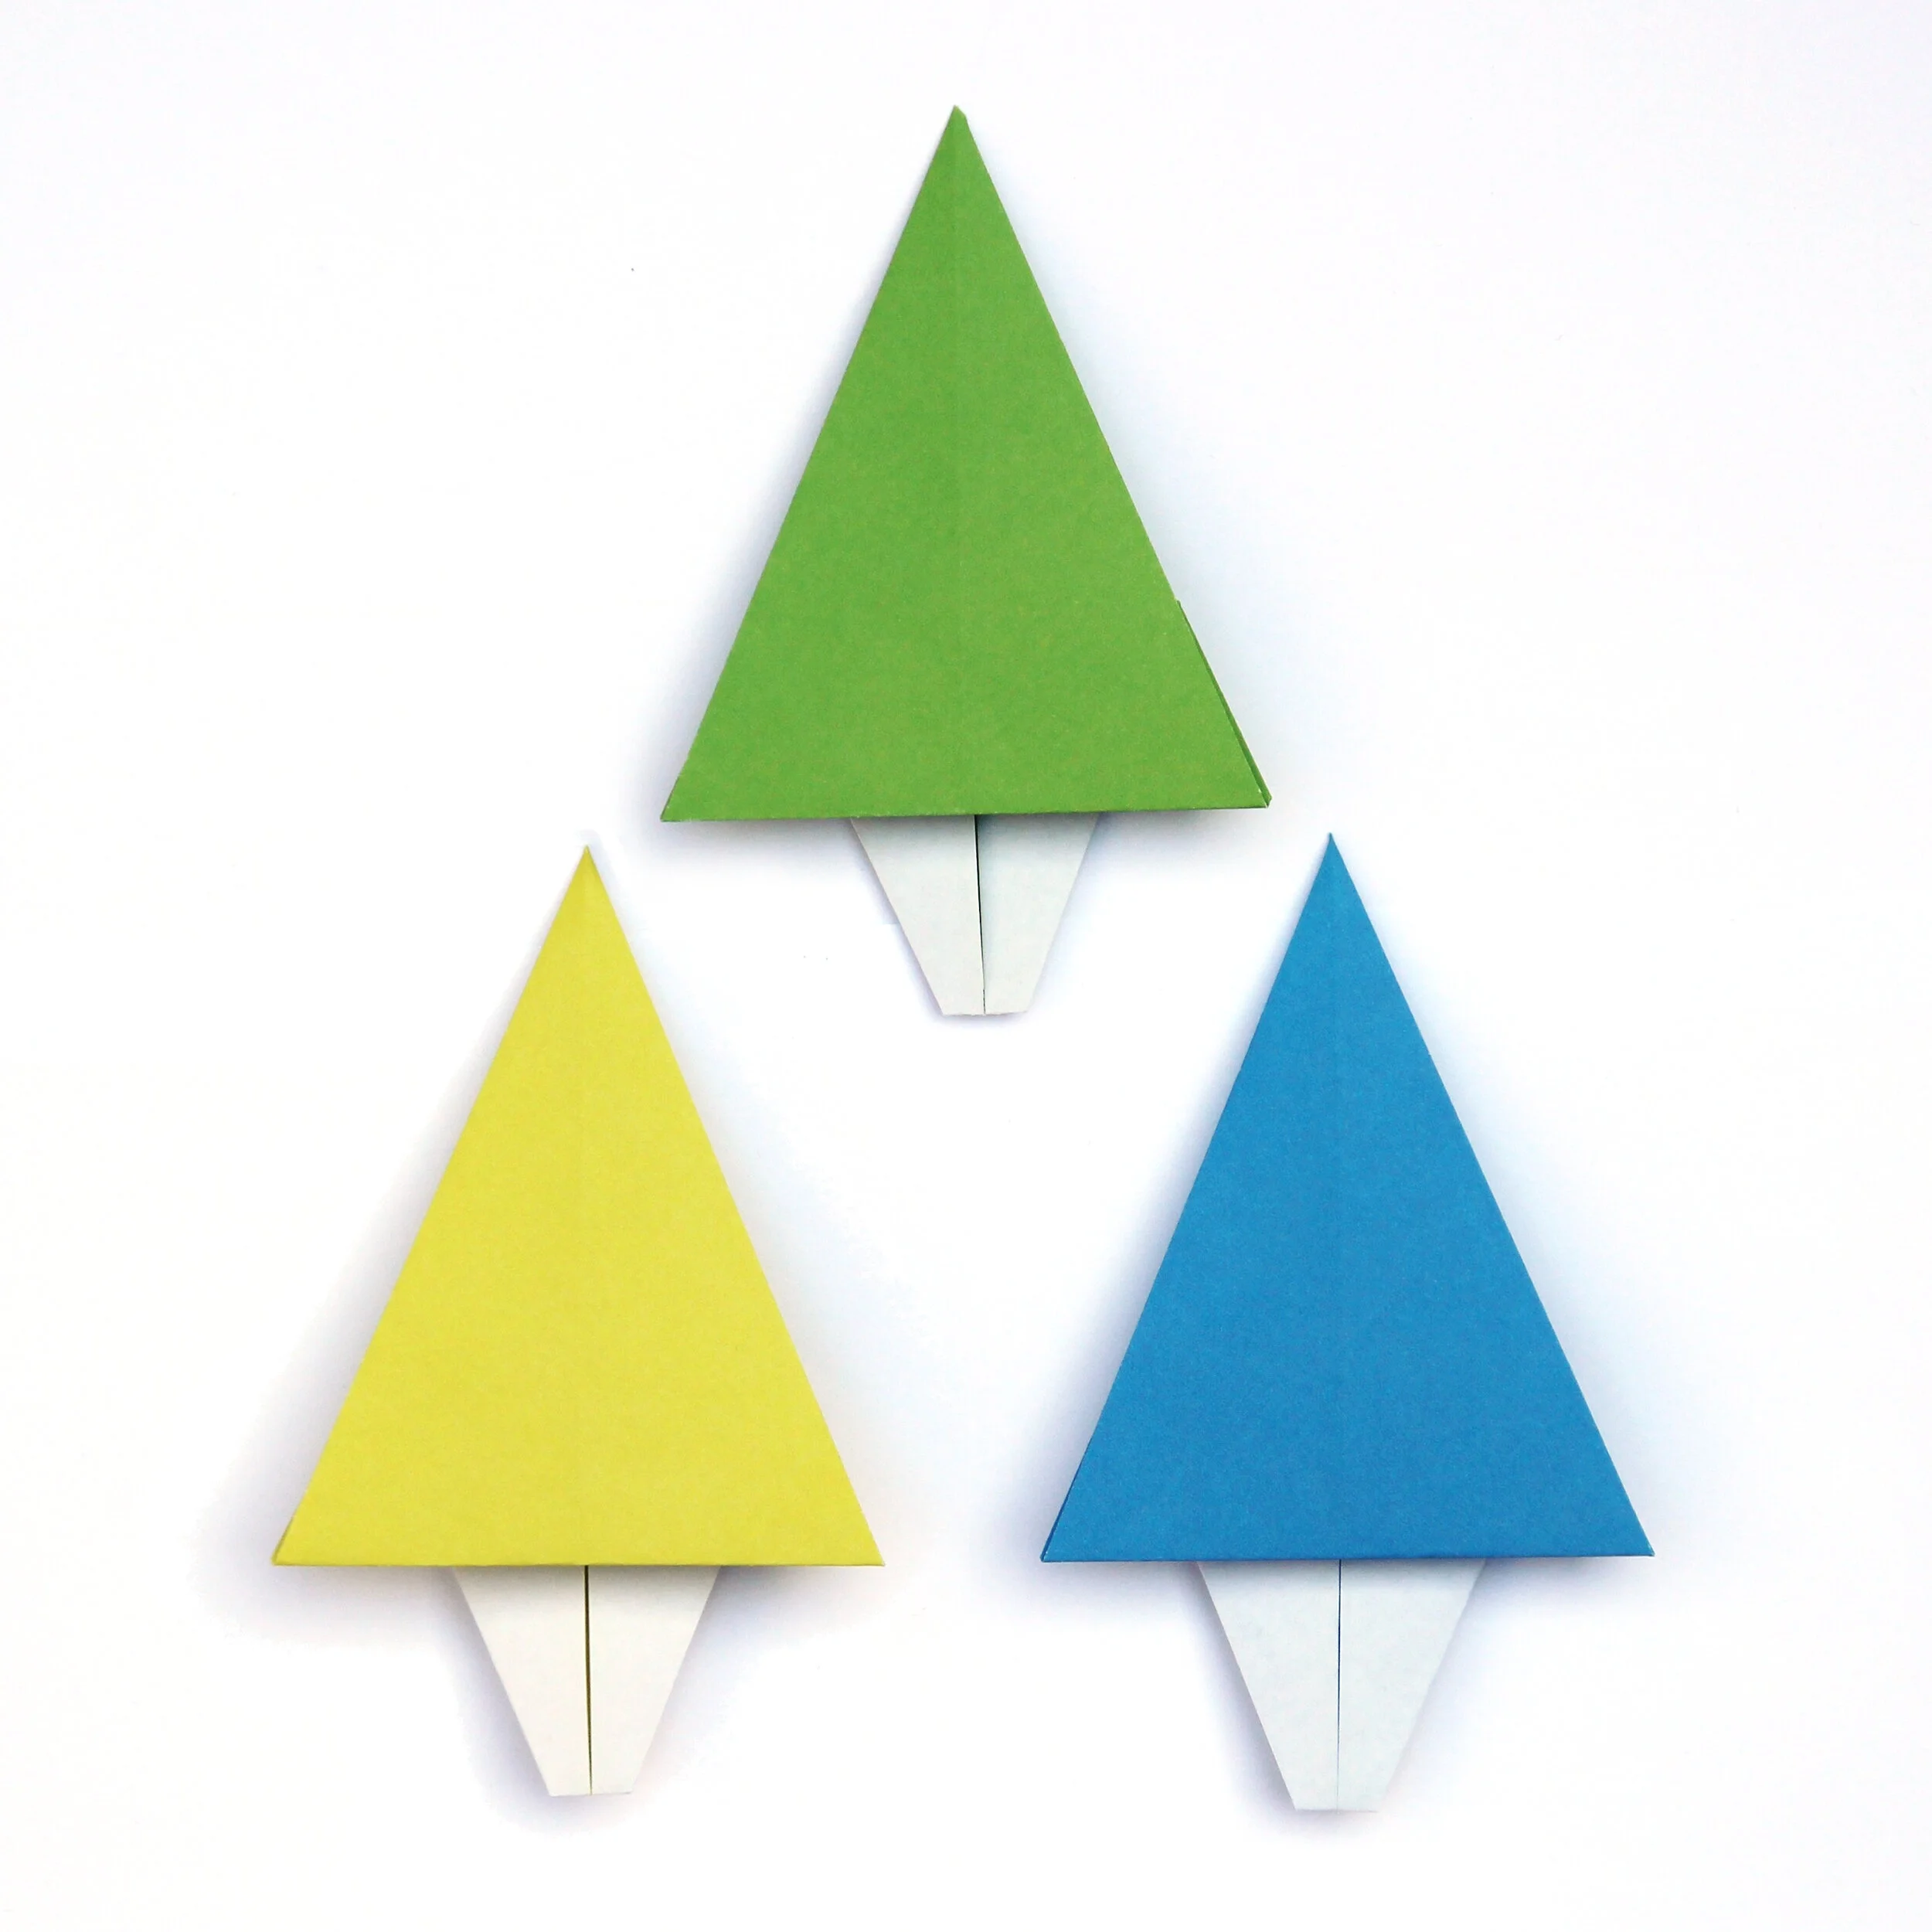
/Learn how to make simple and stylish Origami Christmas Trees. These easy paper trees are a quick Holiday DIY the whole family can make together.
Hang from the tree or pop on the front of a card. Personalise with stickers and hand-drawn details for a truly unique decoration.
This page contains some affiliate links. This means that if you make a purchase after clicking a link I earn a small commission but it doesn’t cost you a penny extra!
Origami Christmas Tree.
I’m back with another easy peasy Christmas origami project for you, Origami Christmas Trees. Did you see my easy origami stars? Or my super cute Origami Santas? These trees are another great one to get the kids involved with as they’re so simple to fold.
I don’t know about you but a homemade Christmas decoration is always a must-have in our house. Last year we made these gorgeous 3D Origami Christmas Trees. These flat paper trees are a fantastic alternative if you want something you can use as a gift tag or card topper.
When it comes to making Christmas decorations or any decorations for that matter, I nearly always turn to paper. It’s such a versatile and accessible material as most people have some sort of paper on hand.
I made ours in shades of green and a pop of blue but feel free to get creative and use patterned paper or origami paper that matches your own Holiday colour scheme.
Follow along with the step by step photo tutorial or scroll to the bottom for a video tutorial.
Origami Christmas Decorations.
These trees are easy to fold and look great on a homemade card or hanging from the tree. They work best if the paper has a contrasting colour on the back like the standard origami paper giving your tree a different colour base.
If you don’t have origami paper gift wrap is a great alternative. Bonus points if you can re-use or recycle any paper you already have lying around the house.
You could even use plain printer paper and have fun decorating them with metallic gel pens, mini pom-poms, Christmas themed sequins and glitter (have you seen this fantastic eco glitter yet? It comes in a huge range of colours) and really put your own spin on them.
Don’t forget to check out my 25 Easy Christmas Origami projects for more origami fun!
Supplies:
Paper (origami paper, scrapbook paper or gift wrap all work well).
This pack of origami paper is a good one if you’re just getting started and don’t want to spend a lot of money.
Scrapbook paper or gift wrap are also good alternatives and come in a wide range of colours and patterns.
Or you can download my FREE printable origami papers!
How to make an Easy Origami Christmas Tree.
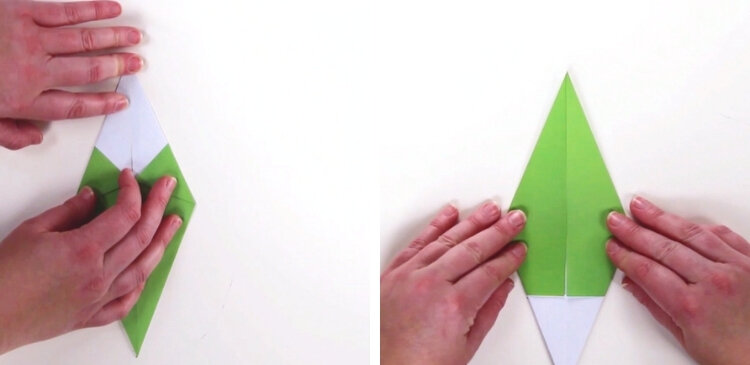
1. Lay paper colour side down.
2. Rotate the paper so it is ‘diamond’ orientation.
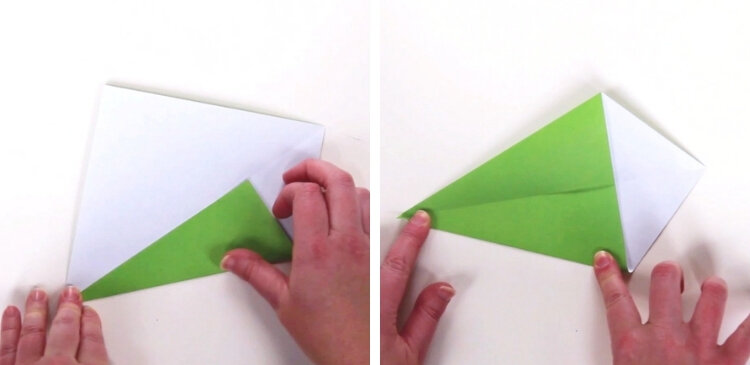
3. Fold in half along the diagonal and unfold.
4. Fold the right edge in to meet the middle crease.
5. Repeat and fold the left edge in to meet the middle crease.
6. Turn over. Make sure the white triangle is at the top.
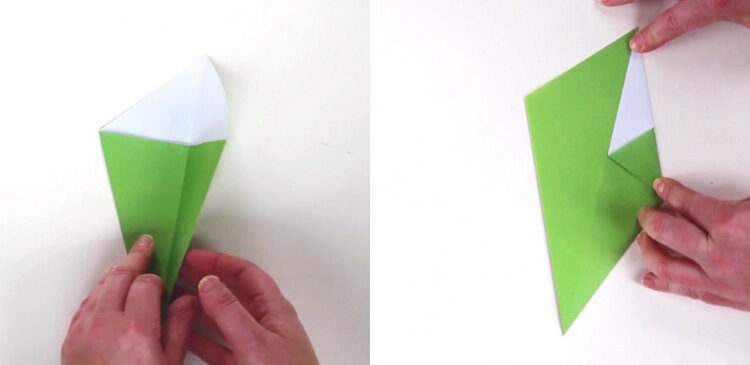
7. Fold the top-right edge in to meet the middle crease.
8. Repeat on the left-hand side.
9. Flip your paper over so the white part is at the bottom.
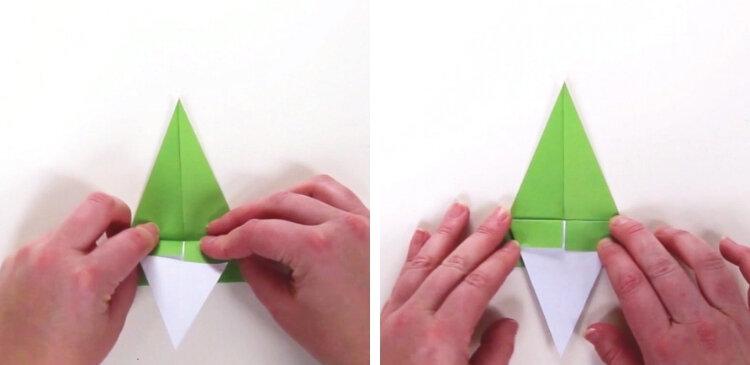
10. Fold in half (bottom to top).
11. Open back out but fold the top flap back down about 3/4 of the way down.
You want a bit of the green to show.
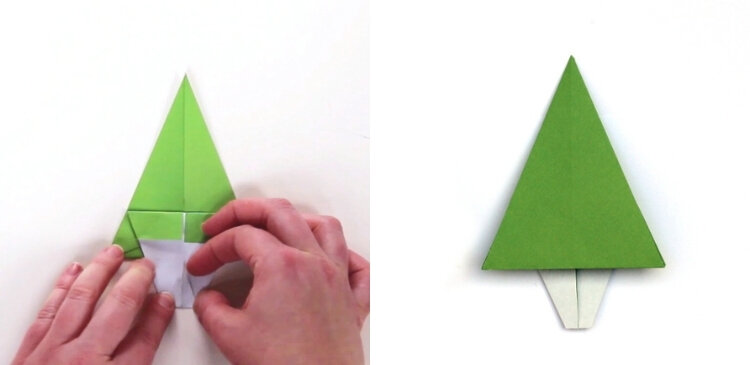
12. Fold the bottom point of the paper up to make the base of the tree.
13. Turn over and you're done!
Top Tip:
Depending on the paper the bottom of your tree can spring out. Apply a little glue or double-sided tape to the base of the tree to hold it in place.
Need more help? Check out the video below to watch exactly how to make them:
What are you making this weekend? If you’re trying out a couple of Holiday crafts why not add these fun paper Christmas trees to your list?

