Easy Origami Wreath
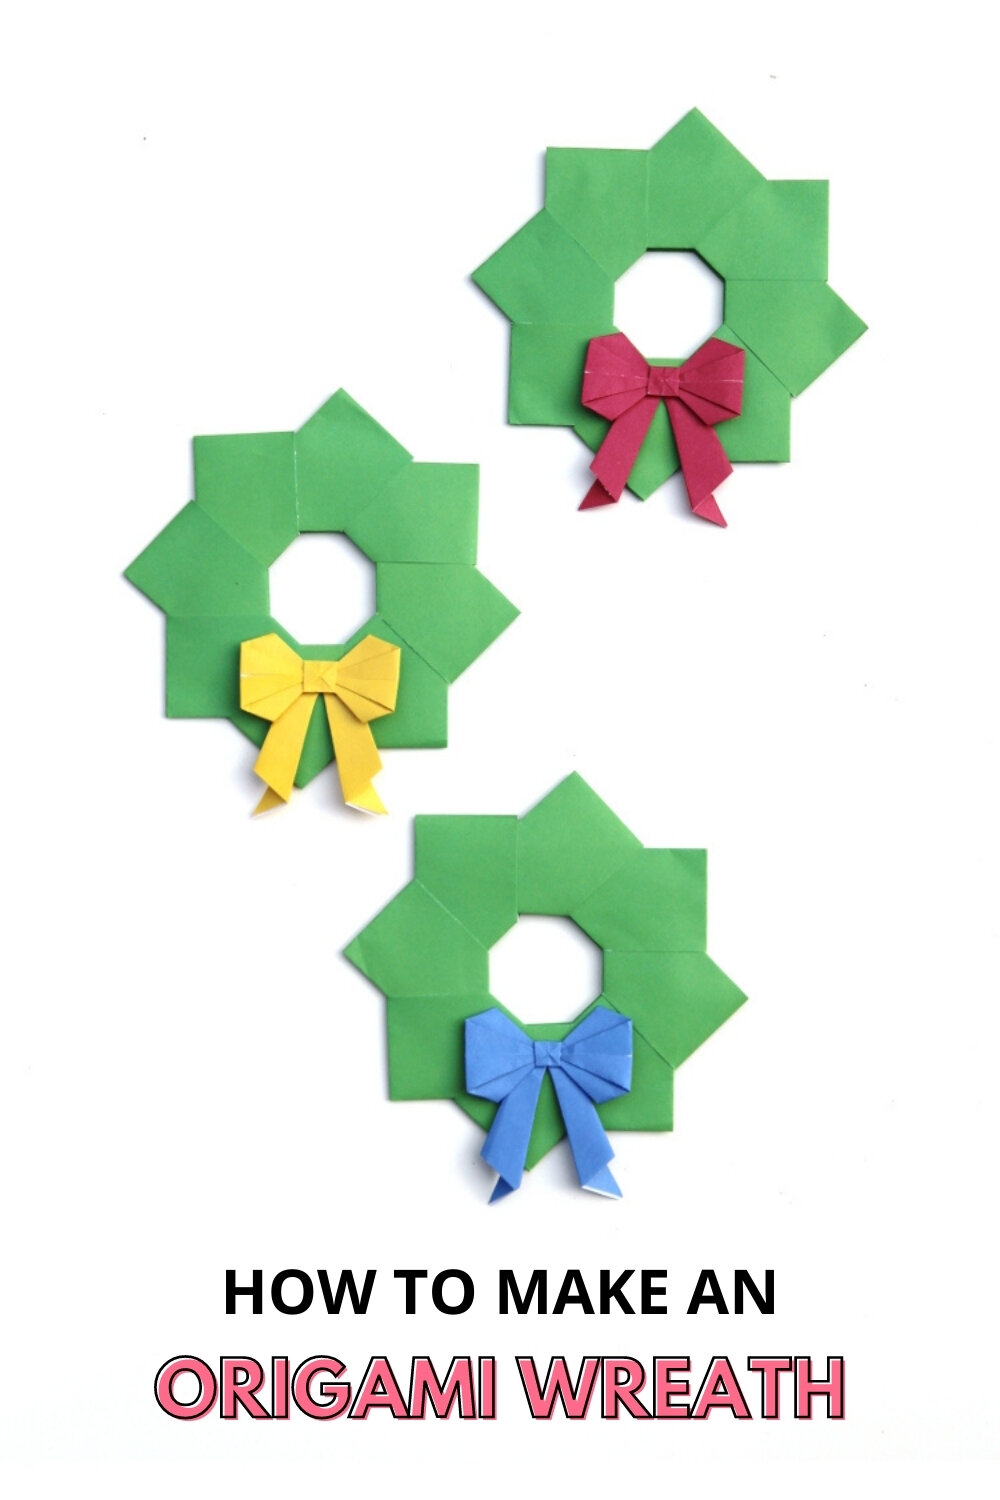
/These mini origami wreaths are the perfect way to welcome the Holidays. Learn how to make your own in just a few simple steps.
They’re an easy paper decoration that can be made in minutes using materials you already have around the house.
A cute addition to your Christmas decor. Ideal for tying onto a gift or hanging from the tree.
This page contains affiliate links. This means that if you make a purchase after clicking a link I earn a small commission but it doesn’t cost you a penny extra!
Origami Christmas Wreath.
Are you ready for another gorgeous Christmas Origami craft? This time it’s a simple but effective origami wreath.
I’ve seen quite a few lovely wreaths around lately and have been itching to try my hand at making one myself. They’re perfect for decorating your home or gifts. A fantastic winter craft that will last for years and years.
This type of wreath may look complicated but is actually very simple to do. It’s made up of 8 identical pieces that slot easily together. No glue required although you may need to use a little double-sided tape to attach your decoration.
I decided to go for a classic Christmas green origami paper for mine but you can use any kind of paper that you like. You can make them from gift wrap, old magazines, scrapbook paper or whatever you happen to have lying around.
They’re an ideal way to use up any leftover wrapping paper and you get a awesome one-of-a-kind decoration out of it as well.
Origami Wreath Instructions.
This mini paper wreath only needs a few simple supplies: Origami Paper, Scissors, A Decoration and some ribbon to hang.
You can easily customise your wreaths with any colour scheme you like. Keep them classic green and red like I did or use pretty pastels or even silver and while if you want a glitzy glam look.
Personally, I can’t get enough of the green, nothing says Christmas quite like the traditional red and green colour combo.
Want to have a go? Keep scrolling for the step by step photo tutorial and video tutorial.
Supplies:
Scissors
Double-Sided Tape or a Tape Runner to attach the bow or other decoration.
How To Make An Easy Origami Wreath:
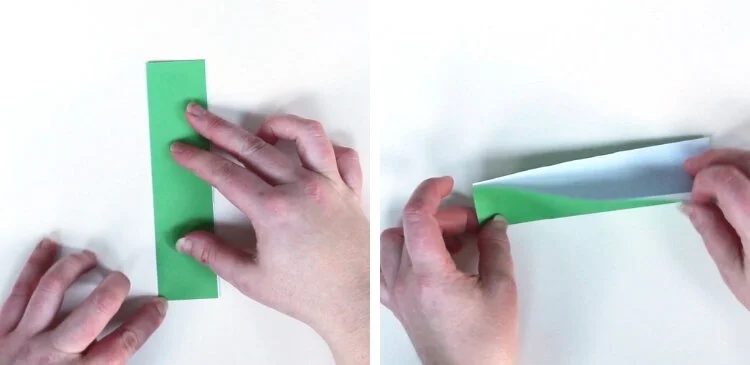
1. For each wreath you’ll need 8 rectangles of paper.
Each rectangle needs to be twice as long as it is wide. The easiest way to do this is to take 4 squares of paper, fold and cut them in half.
2. Take one of the rectangles and fold it in half.
3. You want the folded edge facing towards you and the open edges facing away from you.
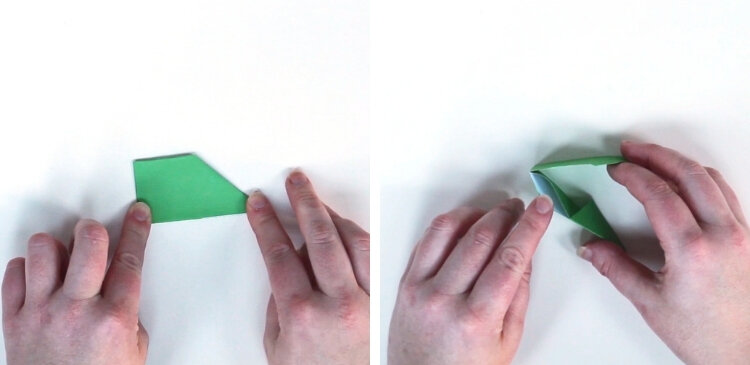
4. Fold the top left corner down to meet the bottom edge.
5. Repeat on the other side.
6. Fold in half.
7. There should be two pockets at the top of your origami. These are the pockets you’ll use to slot the next piece into.
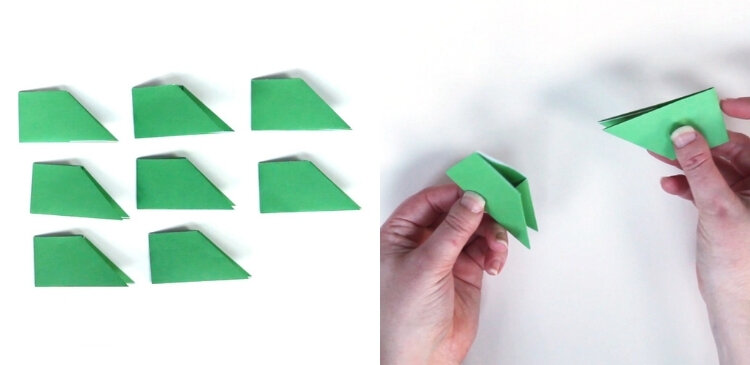
8. Repeat and make 7 more pieces. You’ll need 8 for each wreath.
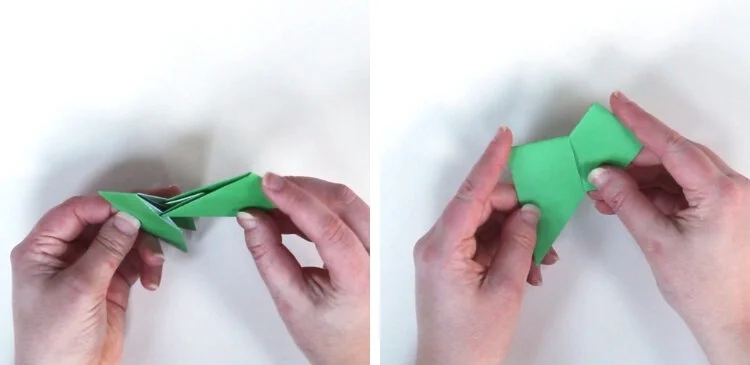
9. Take two of the pieces and slot them together.
10. The two points from the piece on the right slide into the two pockets at the top of the piece on the left.
You want to push the second piece (the piece on the right) until the points touch the bottom of the inside of the pockets.
11. Keep adding and slotting in the pieces to make your wreath.
12. When you’ve got the eight pieces slotted together pull your wreath open slightly and slot in the final piece.
13. Reposition any pieces to make sure you have an even shape. You want the inside of your circle to form an octagon shape.
14. To decorate attach a mini origami bow or maybe one of these mini ribbon bows or these adorable mini holly berries.
15. Hang by threading on some yarn or ribbon to the top of your wreath.

