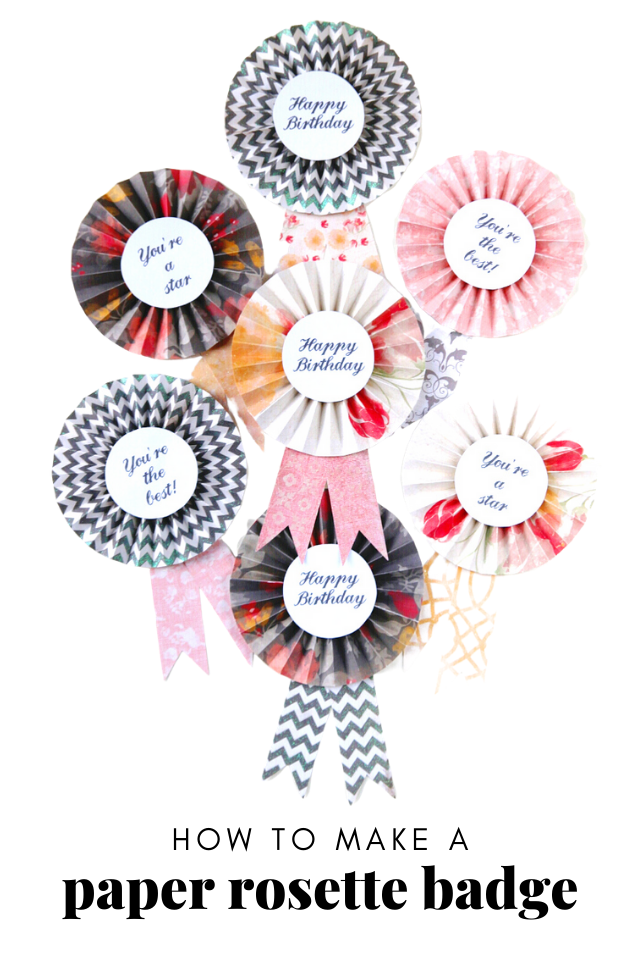
HOW TO MAKE PAPER ROSETTE BADGES.
/Looking to add a pretty handmade touch to your next party? Learn how to make a paper rosette badge.
These cute DIY rosettes are super easy to make and can be made using decorative paper and a glue gun.
Customise them using your favourite scrapbook paper and change up the size for a totally unique paper badge. Use them for birthdays, baby showers and bachelorette parties.
The above links are affiliate links. This means that if you click and purchase through them I receive a small commission.
I helped make a bunch of these DIY paper rosette badges last week for a hen party and thought they'd make a great project to share here on the blog.
Instead of a birthday message shown above we used a photo of the lovely Bride-to-be and put the date of the party on one of the paper tales hanging down.
The finished badges ended up measuring 6.5 inches in circumference. I love the idea of giving someone a giant novelty badge as a keepsake of a special occasion but if you want to make a smaller badge you can adjust the measurements below.
They’re really easy to make so you can make quite a lot of them if you need to. They’re a great project for using up those scrapbook paper scraps.
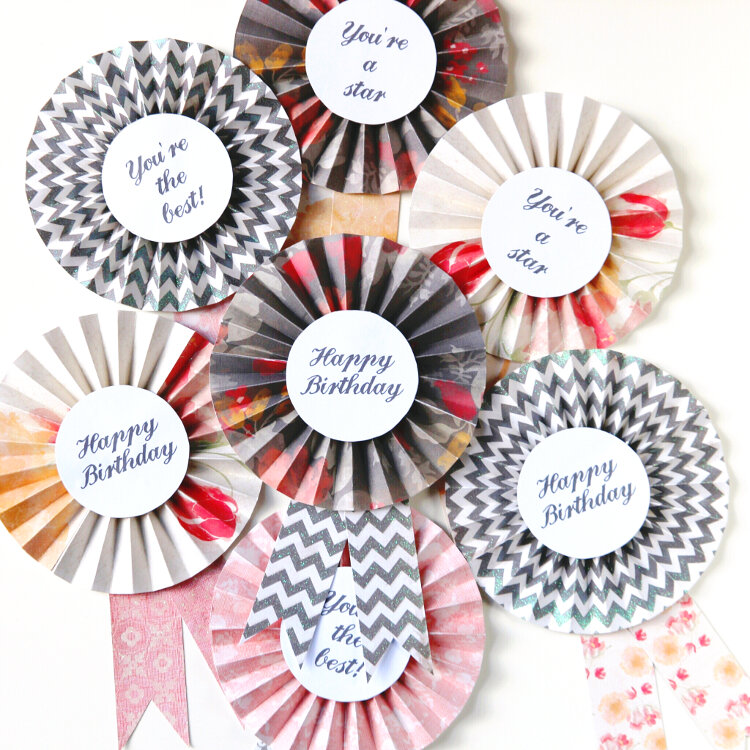
For each rosette you’ll need two strips of paper folded using a concertina fold. Join the stripes together to make a circle and press it flat. Use a glue gun to stick a card circle on the front and back of each one. Attach your message to one side and a pin to the other and you’re good to go.
They can be customised for any occasion or no occasion at all, after all, who wouldn't want to know that you think they're the best? Use them for birthdays, baby showers, Mother’s Day, Father’s Day or party favours.
Wear them as badges, pop them on gifts or bags or simply stick them to the wall. Let's celebrate the special people in our lives.

Supplies:
Scrapbook paper strips (I used In Bloom scrapbook paper from My Mind's Eye, I got it from T.K. Maxx last year but sadly it doesn't seem to be available anymore),
Lightweight card cut into discs,
Printed out birthday messages (I used the Landliebe font. You can download it for free from Font Squirrel here),
A scoreboard and bone folder or an embossing tool and a ruler,
A glue gun,

How To Make A Paper Rosette Badge or Prize Ribbon.
1. Cut your scrapbook paper into 12 x 3-inch strips. You'll need 2 strips of 12 x 3 paper for each badge. For the tales, the paper measured 1.5 x 7 inches.
2. Print out your chosen message onto the lightweight card and cut into discs. You'll need to cut out a plain card disc for the back of each badge as well.
3. Using either a scoreboard or an embossing tool and a ruler score lines every inch on each paper strip.
4. Flip the paper strips over and score every inch again but this time starting at the 1/2 inch mark. So you'll be scoring at 0.5 in, 1.5 in, 2.5 in etc.
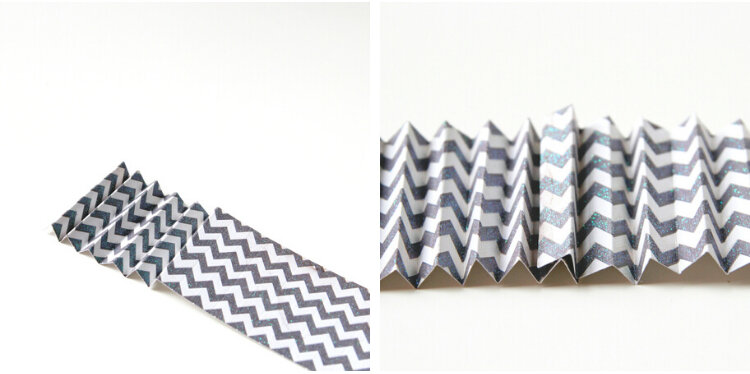
5. Fold along the scored lines to make an accordion fold. Scoring on both sides of the paper should make this process easier.
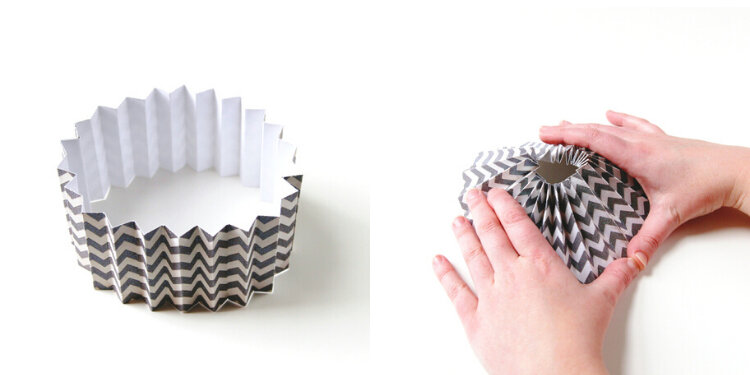
6. Attach 2 accordion strips together to form a circle.
7. Using both hands press the top of the circle down and in until you get a flat rosette.

8. Now comes the tricky part. You might an extra set of hands for this as the rosette will want to pop back up into a circle whenever you let go. Keep your rosette pressed down and use a glue gun to apply some glue to the centre of your circle. A glue gun is perfect for this job as it dries fast but also it dries fast so you need to move quickly.
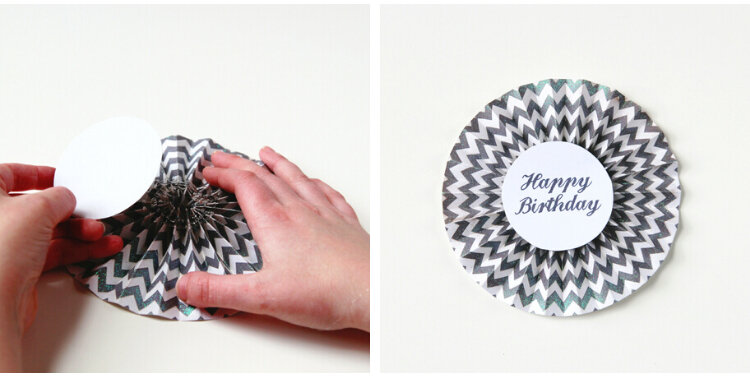
9. Press your printed message onto the front of the rosette. You should now be able to let go of your rosette without it popping back up.
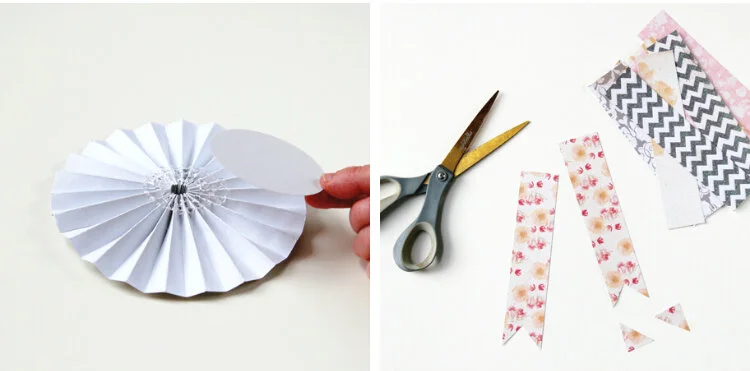
10. Flip your rosette over and glue another card disc to the back.
11. Take the 1.5 x 7 inch strips and cut a triangle into the bottom of each one. Stick them to back of the rosette.
I realised after I'd finished making these that what I should have done and did with the others is stick the tales to the back of each disc before gluing it down. That way all the messy bits are hidden. I'd recommend doing this.
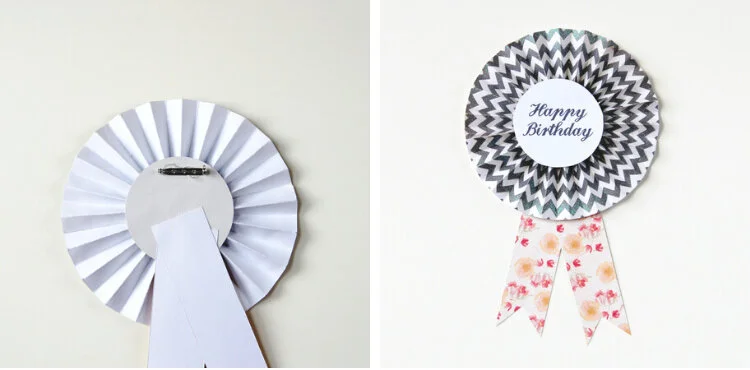
11. Glue a badge pin to the back of the rosette to finish.
There you have it, a super easy paper fan rosette. I hope you enjoy making them as much as I did.